前章では、Webhookの概要とその必要性について説明しました。今回は、具体的にShopifyの注文データをSalesforceにリアルタイムに反映させる方法を、Apex RESTを使用して実装する方法をご紹介します。
ShopifyとApex RESTのシステム構成
ShopifyとSalesforceを連携させるシステム構成は以下のようになります:

- Shopifyで注文イベントが発生
- Shopifyが設定されたWebhookエンドポイント(Salesforce側のApex REST URL)にHTTPリクエストを送信
- SalesforceのApex RESTがリクエストを受信し、正しいShopifyのリクエストかを検証する
- 処理されたデータがSalesforceオブジェクトに反映される
- Apex RESTの基本的なプログラム構成
ShopifyのWebhook設定
まずShopifyに対しての設定を行いましょう。
Webhookの設定画面を開きます。
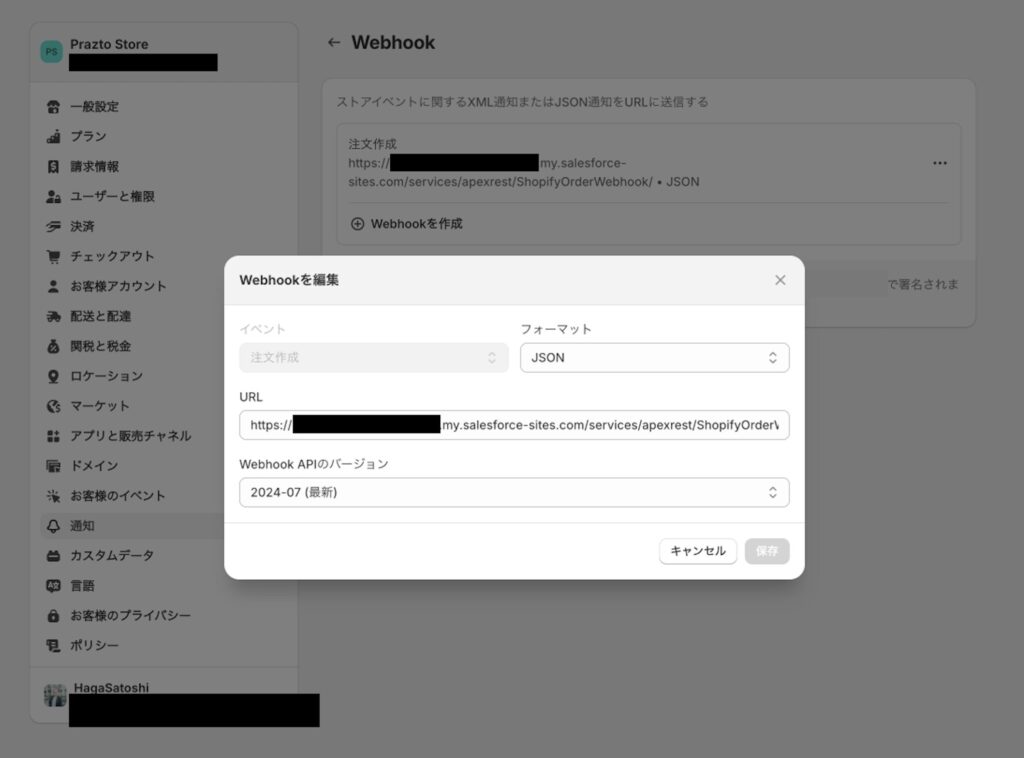
この際にイベントが選べるようになっており、どのような時にShopifyから通知先に通知するかを選択できます。
今回は以下の設定を行います。
- イベント : 注文作成
- フォーマット : JSON
- URL : https://<<Salesforce組織>>.my.salesforce-sites.com/services/apexrest/ShopifyOrderWebhook/
- Webhook APIのバージョン : 2024-07
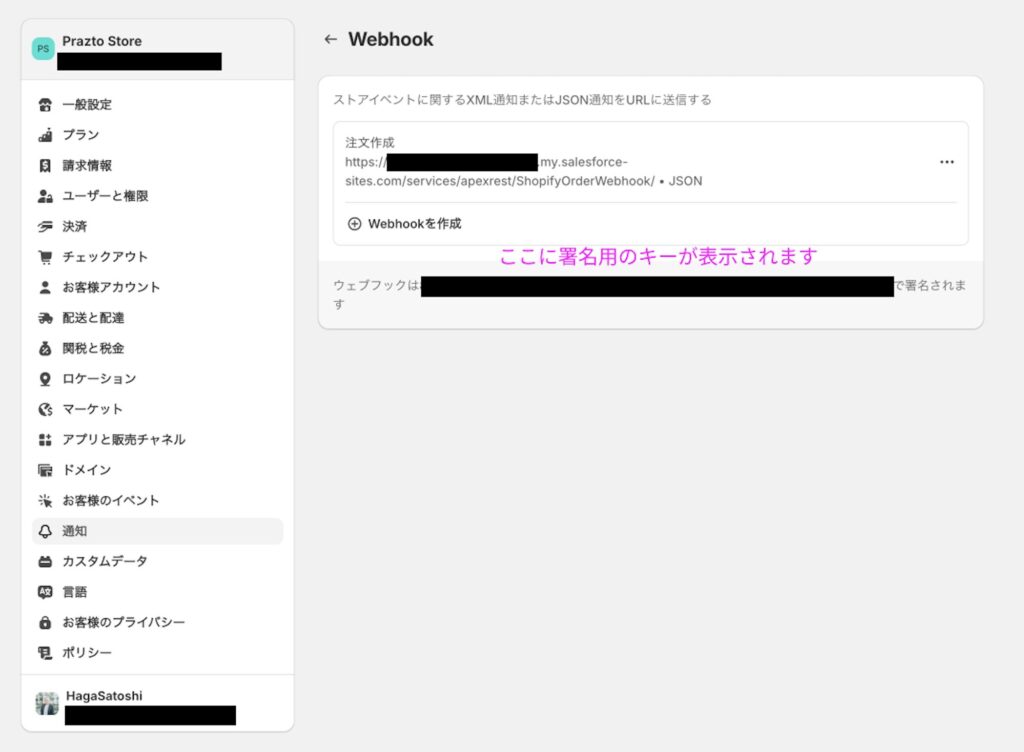
Webhookを作成すると、受取先のシステムが検証で使用する署名用のキーが発行されます(今回のApex RESTでも使用します)
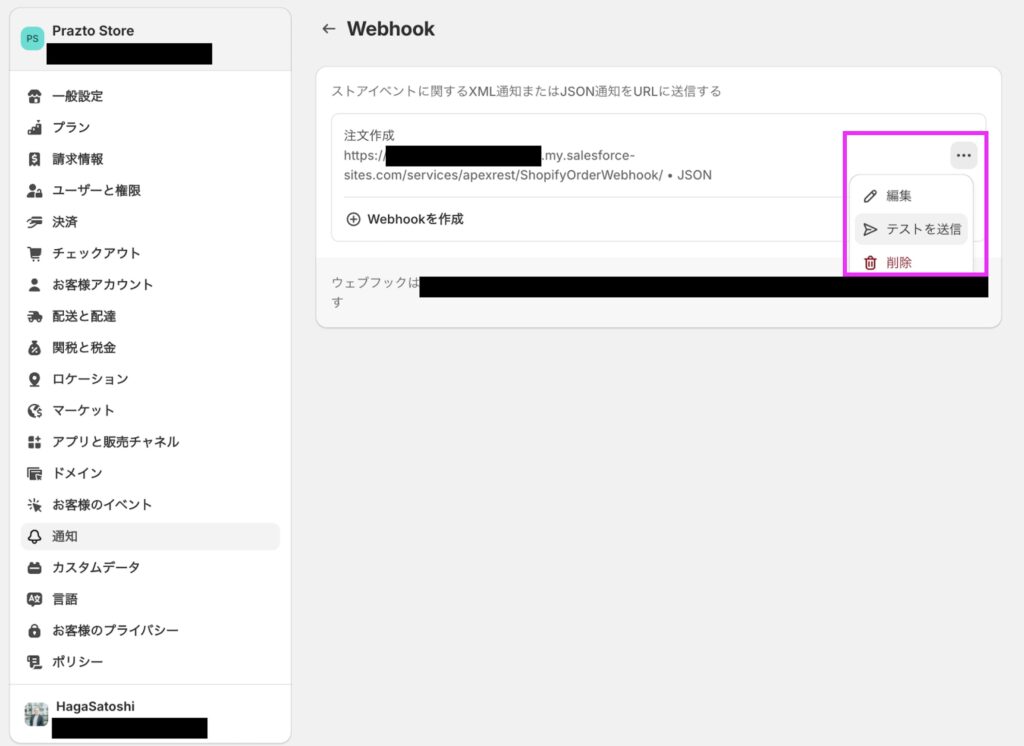
また、ShopifyのWebhookはテスト送信ができるようになっています。今回の検証ではこちらを使用してデモを行います。
次にWebhook通知を受け取るSalesforce側の設定を行います。
Salesforceのオブジェクト設定
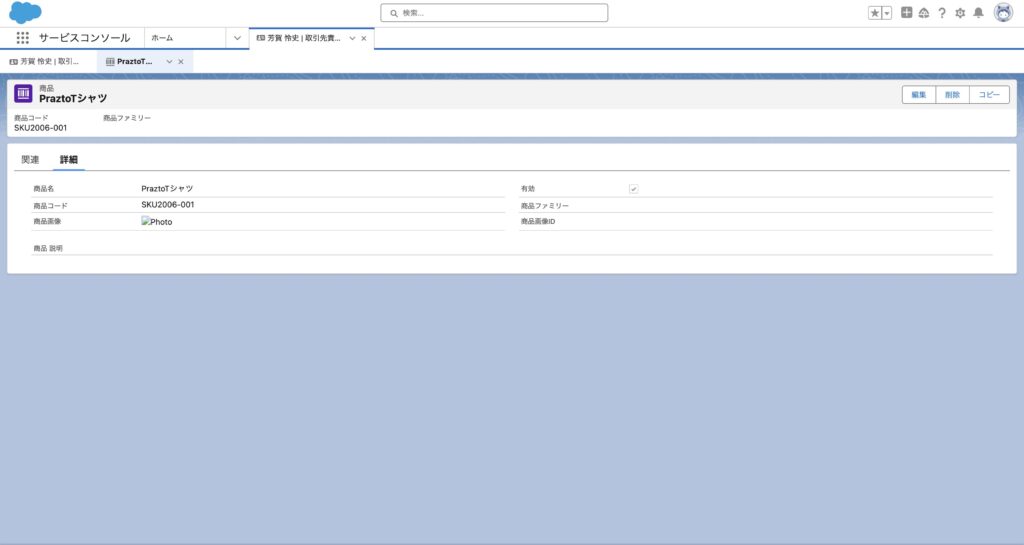
次にShopifyのWebhookに対応する商品レコードを登録します。
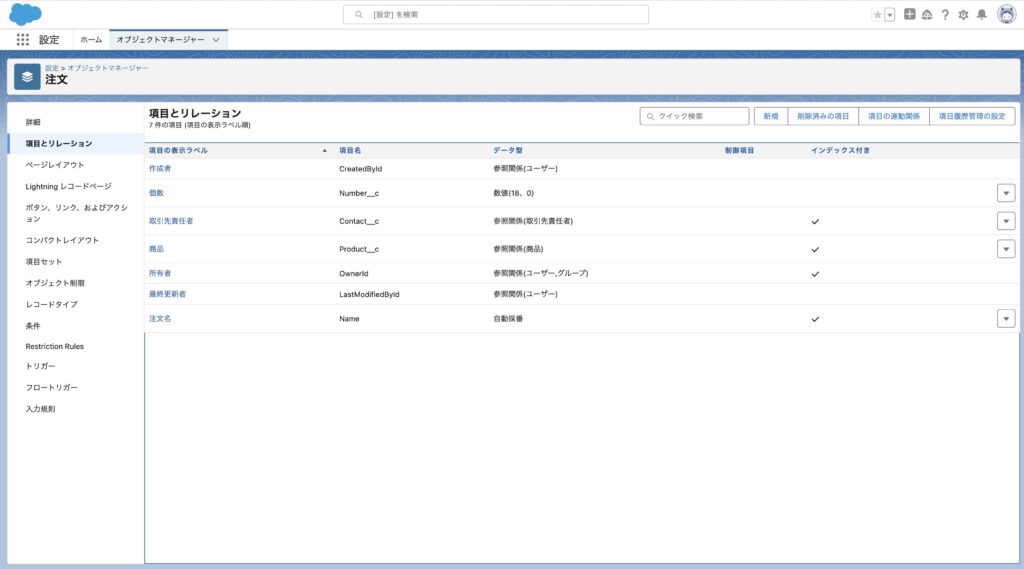
次にShopifyの注文情報を保存するオブジェクトの登録をします。今回はWebhookの取り込みの例なので、シンプルに取引先責任者と商品の間に中間オブジェクトをカスタムオブジェクトで作成することにします。カスタム項目も、一旦は数量のみを定義するようにします。
Apexクラスの作成
次にApex RESTとしての最低限のApex Classを作ります。このアノテーションを記載してApexクラスを作成して、後続の設定を行えばApex RESTが構築できるんです。とても便利ですよね。
@RestResource(urlMapping='/ShopifyOrderWebhook/*')
global without sharing class ShopifyOrderWebhookHandler {

    @HttpPost
    global static void handlePostRequest() {
      //ここにビジネスロジックを記載する。
    }
}
検証処理
次に検証処理です。まずShopify側の公式サイトではどのように書いてあるのかを確認します。
こちらのサイトに仕様が記載されています。
Step 2: Validate the origin of your webhook to ensure it’s coming from Shopify
Before you respond to a webhook, you need to verify that the webhook was sent from Shopify. You can verify the webhook by calculating a digital signature.
Each webhook includes a base64-encoded
X-Shopify-Hmac-SHA256 field in the payload header, which is generated using the app’s client secret along with the data sent in the request.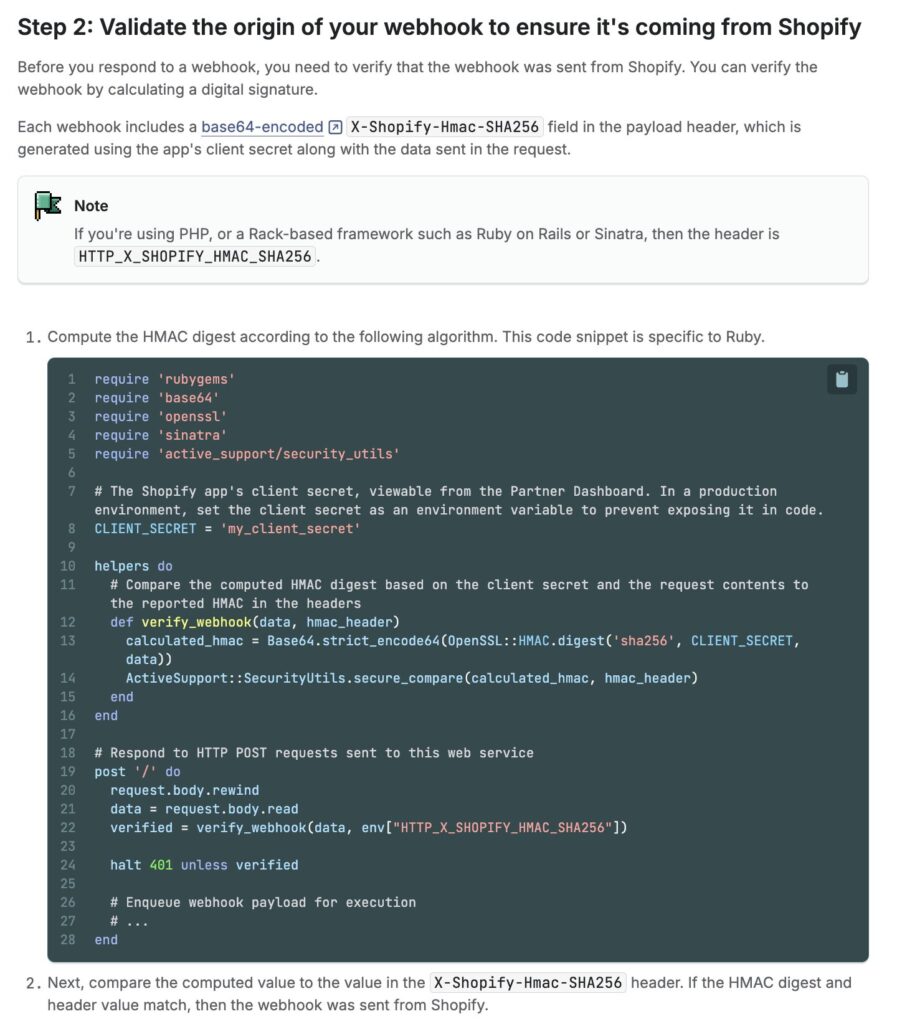
Shopifyのリクエストヘッダーに含まれるHMAC (X-Shopify-Hmac-Sha256) と、リクエストボディと検証キー(上記を参照)を使って、算出した HMAC が同じ値になるかどうかを検証するというものです。
これをApex RESTに実装します。以下では、カスタムメタデータにShopifyの検証キーを保存しています。
@RestResource(urlMapping='/ShopifyOrderWebhook/*')
global without sharing class ShopifyOrderWebhookHandler {

    @HttpPost
    global static void handlePostRequest() {
        RestRequest req = RestContext.request;
        RestResponse res = RestContext.response;

        // リクエストボディを取得
        String requestBody = req.requestBody.toString();

        // Shopifyから送信されたHMAC
        String shopifyHmac = req.headers.get('X-Shopify-Hmac-Sha256');

        // カスタムメタデータから署名用のキーを取得
        Shopify_Settings__mdt settings = Shopify_Settings__mdt.getInstance('Default');
        String hmacKey = settings.HmacKey__c;

        // Shopifyの仕様に基づいた検証処理
		if (!validateShopifyRequest(requestBody, hmacKey, shopifyHmac)) {
            res.statusCode = 401;
            res.responseBody = Blob.valueOf('Unauthorized');
            return;
        }

        // これ以降に注文の作成処理を記載する。

    }

    // Shopifyの仕様に基づいた検証処理
    private static Boolean validateShopifyRequest(String requestBody, String hmacKey, String shopifyHmac) {
        Blob hmacData = Crypto.generateMac('hmacSHA256', Blob.valueOf(requestBody), Blob.valueOf(hmacKey));
        String calculatedHmac = EncodingUtil.base64Encode(hmacData);

        return (shopifyHmac == calculatedHmac);
    }

}
次にこのApexがShopifyのWebhookから実行されるように設定します。サイトのサイトゲストユーザーの設定を使用します。サイトゲストユーザーはこの”注文作成処理”のみを行え、他の用途でのレコードの閲覧等は行えるようにすべきではないので、サイトゲストユーザープロファイルのApex実行権限のみを設定します(その為にwithout sharingにします)。


注文作成の処理
前の処理で正しく検証がされた場合にのみ、注文作成の処理を実行します。今回の処理ではサンプルとして以下のようなApexクラスになります。
@RestResource(urlMapping='/ShopifyOrderWebhook/*')
global without sharing class ShopifyOrderWebhookHandler {

    @HttpPost
    global static void handlePostRequest() {
        RestRequest req = RestContext.request;
        RestResponse res = RestContext.response;

        // リクエストボディを取得
        String requestBody = req.requestBody.toString();

        // Shopifyから送信されたHMAC
        String shopifyHmac = req.headers.get('X-Shopify-Hmac-Sha256');

        // カスタムメタデータから署名用のキーを取得
        Shopify_Settings__mdt settings = Shopify_Settings__mdt.getInstance('Default');
        String hmacKey = settings.HmacKey__c;

        // Shopifyの仕様に基づいた検証処理
		if (!validateShopifyRequest(requestBody, hmacKey, shopifyHmac)) {
            res.statusCode = 401;
            res.responseBody = Blob.valueOf('Unauthorized');
            return;
        }

        // Webhook通知をMap<String, Object>に読み取る
        Map<String, Object> orderData = (Map<String, Object>) JSON.deserializeUntyped(requestBody);

        // 注文者のメールアドレスを取得
        String customerEmail = (String) ((Map<String, Object>) orderData.get('customer')).get('email');

        // 取引先責任者を検索
        Contact customerContact;
        List<Contact> contacts = [SELECT Id FROM Contact WHERE Email = :customerEmail LIMIT 1];
        if (!contacts.isEmpty()) {
            customerContact = contacts[0];
        }

        // 商品情報を取得
        List<Object> lineItems = (List<Object>) orderData.get('line_items');
        if (lineItems.isEmpty()) {
            res.statusCode = 400;
            res.responseBody = Blob.valueOf('No line items found');
            return;
        }

        //デモコードのため、注文内の1件目のみを処理
        Map<String, Object> firstItem = (Map<String, Object>) lineItems[0];

        //skuを取得して商品を検索
        String sku = ((String) firstItem.get('sku')).trim();
        List<Product2> products = [SELECT Id FROM Product2 WHERE ProductCode = :sku LIMIT 1];
        if (products.isEmpty()) {
            res.statusCode = 400;
            res.responseBody = Blob.valueOf('Product not found');
            return;
        }
        Product2 product = products[0];

        // 注文レコードを作成
        Order__c newOrder = new Order__c(
            Number__c = (Integer) firstItem.get('quantity'),
            Contact__c = customerContact?.Id,
            Product__c = product.Id
        );

        try {
            insert newOrder;
            res.statusCode = 200;
            res.responseBody = Blob.valueOf('Order created successfully');
        } catch (Exception e) {
            res.statusCode = 500;
            res.responseBody = Blob.valueOf('Error creating order');
        }
    }

    // Shopifyの仕様に基づいた検証処理
    private static Boolean validateShopifyRequest(String requestBody, String hmacKey, String shopifyHmac) {
        Blob hmacData = Crypto.generateMac('hmacSHA256', Blob.valueOf(requestBody), Blob.valueOf(hmacKey));
        String calculatedHmac = EncodingUtil.base64Encode(hmacData);

        return (shopifyHmac == calculatedHmac);
    }
}
正しく動作するかをテストしてみましょう。

ShopifyのWebhookの画面からテスト送信を行います。
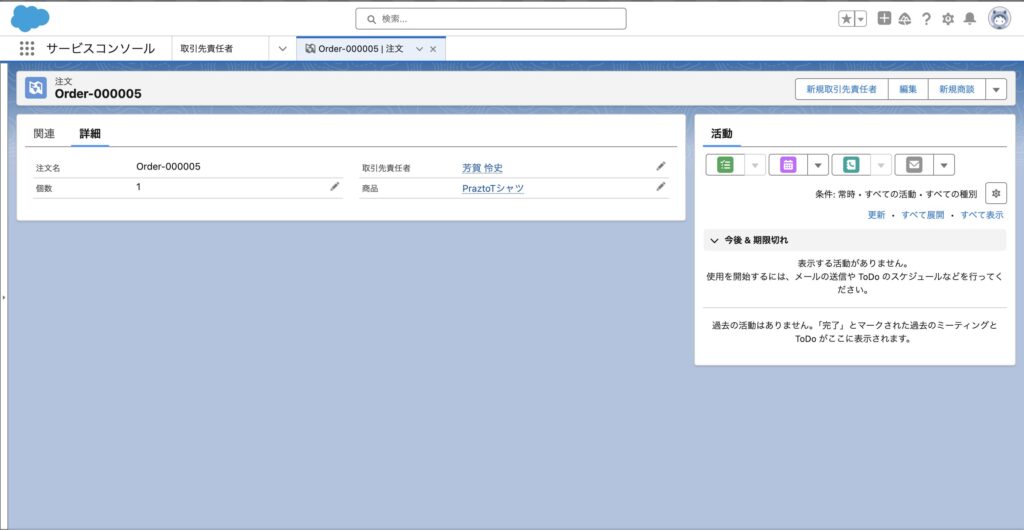
無事に注文レコードがSalesforceに作成されました。作成者もサイトゲストユーザーになっているので、たしかに今のテスト送信で作成されたことがわかります。
まとめ
今回は、ShopifyのWebhook通知をSalesforceで受け取り、Apex RESTを使用して処理する方法を詳しく解説しました。Salesforceでは、このようにApexを使用してAPIのエンドポイントを作成できるため、ShopifyのWebhookが求める検証処理も問題無く実装でき、Webhookに合わせた柔軟なデータ処理も実装することが可能です。
次の章では、PraztoがこれまでWebhookを使用してどのようなシステム間連携を構築してきたのかをご紹介いたします。

